You typically issue a courtesy pass to a visitor in the following situations:
• A visitor is not registered in VendorStat and has management approval to enter the facility.
• A visitor does not have a visit scheduled in VendorStat and has management approval to enter the facility.
|
Note Follow all of your Health System’s security procedures, any time you issue a Courtesy Pass with VendorStat. |
Before You Begin
A visitor must present a valid form of identification, before they can receive a Courtesy Pass.
|
Note Follow your Health System procedures for acceptable forms of identification. |
1 Login to VendorStat with your user name and ID (see Login To VendorStat).
VendorStat displays the Security Home screen. This screen provides a set of buttons that you can use to start the check in process.
2 Click on the Checkin: Manual button.
VendorStat displays the Today’s Visits screen with a Search Visits option. At the bottom of the screen there is a statement, “Visit not scheduled, do you want to issue a Courtesy Pass?”
3 Click on the Yes button.
VendorStat displays the Courtesy Visit screen. Use this screen to enter information for this visit, the visit sponsor, and the visitor.
|
Note All of the fields marked with a red “*” are required fields. You must complete all of the required fields on the Courtesy Visit screen, before you can continue. |
The following table provides a description of the form fields on the Courtesy Visit screen:
|
Form Field |
Description |
|
Visitor - Driver’s License |
Enter the visitor’s driver’s license number. |
|
Visitor - First Name |
Enter the visitor’s First Name. |
|
Visitor - Last Name |
Enter the visitor’s Last Name. |
|
Visitor - Company |
Enter the name of the visitor’s company. |
|
Visitor - Email |
Enter the visitor’s email address. |
|
Visitor - Phone |
Enter the visitors phone number. |
|
Sponsor - First Name |
Enter the sponsor’s first name. |
|
Sponsor - Last Name |
Enter the sponsor’s Last Name. |
|
Sponsor - Phone |
Enter the sponsor’s phone number. |
|
Sponsor - Email |
Enter the sponsor’s email address. |
|
Visit Start Date/Time |
Enter the date and time that the visit is scheduled to begin. |
|
Visit End Date/Time |
Enter the date and time that the visit is scheduled to end. |
|
Visit Destination / Information |
Enter the location for the visit. |
|
Visit Purpose |
Enter a brief description of the purpose for the visit. |
|
Reason |
Enter more detailed information on the nature of the visit, if needed. |
|
Access Level Needed for the Visit |
Use the drop-down list to select the Access Level required for this visit (for more information, see Access Levels). |
4 Once you have finished entering the information, click on the Create Courtesy Pass button.
VendorStat displays the Badge screen. Use the instructions on this screen to take a photo of the visitor and copy that photo to VendorStat.
5 Use the camera software to take a photo of the visitor.
a Minimize VendorStat (Internet browser window) on your workstation computer.
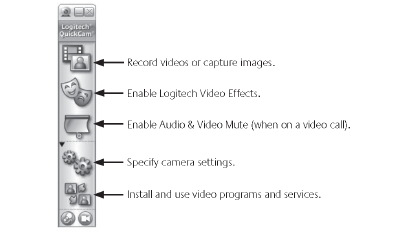
Your computer desktop displays the camera software toolbar.
Camera Software Toolbar
b Click on the Record Videos or Capture images button to start the camera software.
The camera software displays a live image from the camera on your computer desktop.
c Have the visitor look at the camera.
View the image on your screen and adjust the position of the camera, as needed.
d In the camera software, click on the Take Photo button.
The camera software captures an image and temporarily stores it in your computer.
Take Picture Button
![]()
6 Copy the image to VendorStat.
On your workstation desktop, click on the copyimage.bat icon. This activates a “batch” file that will automatically copy the image you just captured into VendorStat.
Copyimage.bat Icon

|
Note This step copies the image from your computer for temporary use by the VendorStat. |
7 Once you have copied the image to VendorStat, click on the Preview Badge button in the Badge screen.
VendorStat displays the Badge Preview screen. Use this screen to verify the information for the visit, the visitor, and the visit sponsor.
8 When you have verified the information, upload the image to the VendorStat database.
Uploading the scanned image to the VendorStat database allows the system to store the information and simplifies the check in process for that visitor in the future.
a Click the Browse button. VendorStat opens a choose file window.
b Navigate to the c:\scannedimages folder.
c Select the file named Image-A-Face.jpg
d Click on the Open button.VendorStat returns to the Badge Preview Screen.
e Click on the Upload Image Button
9 Collect the visitor’s driver’s license.
Once the Image upload is complete, VendorStat displays a reminder for you to collect the visitor’s license.
|
Note Follow your Health System’s policies and procedures on handling, storing, and safeguarding visitor’s licenses. |
10 Click the OK button.
VendorStat displays the Badge Preview Screen again. Use this screen to review the details of the visit.
11 Click on the Print Badge button.
VendorStat prints the badge and updates the status information on the list of visits.
|
Note If one visitor has multiple visits scheduled for the same day, you can repeat this procedure to print badges and check them in for each visit. Follow your Health System’s procedures for multiple visits. |
12 Present the badge to your visitor.
Follow your Health System’s policy and provide the visitor with any additional instructions, paperwork, etc. that may be required for Vendor Representatives visiting your facility.
For information on how-to use VendorStat to check out a visitor after they finish their visit, see Visitor Check Out.